Browning and color loss are at the very foundation of pressing.
So when you deal with them, it can feel discouraging.
But I have good news!
Once you understand what is actually happening during the pressing process, the guesswork falls away.
You stop pressing and hoping, and you start pressing and knowing!
This guide is the version I wish someone had handed me at the beginning:
why flowers brown
why they fade
how to prevent most of it
Understand these basics, and you can press almost any flower with confidence.
Browning and fading are mostly the same problem
Browning and fading are the sides of the same coin:
The faster and more completely you pull moisture out of a flower, the less it browns and the better it holds its color.
So the technique that solves one tends to solve the other. Dry the flower quickly and thoroughly, and you have taken care of both at once.
There is one important exception, and I will come back to it near the end:
A category of flowers loses their color because of how their pigments are built.
No method saves them, and that is not a reflection of your skill.
A little bit of science (kept simple)
When you press a flower, you are asking it to look alive long after it has stopped being alive, and nature pushes back.
A fresh flower is mostly water held inside living cells. The color sits inside those cells like dye in a water balloon.
The moment you cut it, it begins to break down. Two things start competing:
your effort to dry it fast
the flower’s own chemistry trying to fall apart
Browning is what you see when the breakdown wins.
It is the same process that turns a cut apple brown on the counter. It speeds up when moisture and air sit together on the petal too long.
Get the water out quickly, and you starve that process before it can take hold.
Color, though, follows a few rules of its own. Here is what pigment does, and why:
Saturation predicts survival. Deep colors are built from tougher, more stable pigments. Pale colors start thin, and pressing often washes them out almost entirely.
White is a trick of light. Most white flowers have no white pigment at all. Tiny air pockets inside the petal scatter light, and your eye reads that as white. When those pockets collapse as the petal dries, whatever faint undertone was hiding underneath, a little yellow or green, comes forward.
Heat and pressure nudge color. A quick pass through a microwave press pulls water out fast, which is what you want. But too much heat can push a pale petal toward yellow or brown. Firm pressure dries a petal flat and evenly, which protects color. Very thin petals can bruise if they went in wet or are already damaged.
Green goes first. Stems and leaves fade faster than almost any flower color. When you plan a piece meant to last, lean on deep, saturated color and treat the green as the part most likely to shift.

Photo taken in November 2022

Photo taken in July 2026
Start with a flower that can actually press well
You cannot rescue a flower that was doomed before it entered the press, so a little care at the front end saves a lot of disappointment later.
If you grow your own, timing your cut is the highest-leverage thing you can do:
Pick in the morning once the dew has dried, or in the early evening. Both windows show a well-hydrated flower inside, with no surface water clinging to the petals. Avoid cutting right after rain or watering.
Pick a little younger than you might think. A bloom that has just fully opened, before its center has been pollinated and gone fluffy with pollen, presses with better color and a cleaner center than one past its peak. This matters most for open-faced flowers like cosmos, daisies, and calendula, where the center is the first thing to brown or dome up.
If you are pressing flowers you did not grow, here are a few tips to improve pressing results:
Remove any water tubes or damp wrapping
Loosen up the stems and give them a fresh cut
Inspect the flowers for any moisture
Shake gently upside down if you spot any water drops
Let them sit in water for a couple of hours
I go deep on harvest windows for specific flowers in my hardy annuals guide and summer annuals guide, and on managing surface moisture in my traditional press guide.
Is it browning or damage?
Before we get into technique, one reassurance:
A lot of what beginners read as a browning failure turns out to be bruising instead.
If a petal took a knock before it went into the press, dropped on the floor, or squished against the side of a box, that damage will darken under pressure and look exactly like a browning problem.
The difference matters, because bruising is not a sign you pressed the flower wrong.
So when you open a press and find a dark patch, look at how it browned.
Whole petal browned evenly? That points to moisture or chemistry, and calls for better technique.
Dark in one spot where the petal was handled? That’s a bruise, and calls for gentler handling and pulling damaged petals before they go in.
I break down the moisture-driven causes in detail in my browning guide.
The fundamentals that lead to better pressing
If browning and color both come down to getting moisture out fast, then a handful of fundamentals do most of the work.
1. Use real blotting paper, and use plenty of it
Blotting paper is thicker and thirstier than copy paper and pulls water out noticeably faster, which is the whole game for color.
Copy paper works when you are starting out, and there is no shame in it, but if you want the best possible results, blotting paper earns its cost.
Whatever you use, use enough: at least five sheets above the flowers and five below. Fewer flowers per sheet with more paper around them beats a packed layer every time.
2. Change your paper after the first 48 hours, not every day
Daily changing is probably the most repeated bad advice in pressing. Here is what actually works:
Wait about 2 days for the first change. After 1 day in the press, the flower is still soft and sticky. It clings to the paper and tears as you lift it. This is why I change the paper after 2 days.
Change all of the paper and the cardboard.
Change again 2-3 days later. That is usually plenty, and most flowers are done in about 7-10 days.
3. Thin out thick flowers
Any flower with more than about 3 rows of petals traps moisture in its center faster than the paper can pull it out. You have two ways to fix it:
Remove the inner rows, so the flower dries evenly.
Or take the flower fully apart, press the petals individually, and rebuild it later when you mount your piece.
4. Pull any wilted or bruised petals before pressing
A petal that is already failing will keep failing in the press and almost always browns. If you are pressing for a client, this step is not optional.
5. Skip parchment paper
It is designed to repel moisture, which is the exact opposite of what a pressing paper is for. Every layer in your press should be pulling water out; parchment pulls in the wrong direction.
Going beyond paper: pads, towels, and desiccant boards
Paper is the default, but it is not the only material that pulls moisture out of a flower.
A couple of alternatives have earned a permanent place in my workflow.
Natural fiber pads and towels
Cotton pads (the cosmetic kind) and reusable bamboo towels are what I reach for most, because they are easy to find and inexpensive. Both absorb moisture faster than paper and hold more of it, which is exactly what you want for cleaner color and less browning. My results with them have been excellent.
Wool felt pads work on the same principle and press beautifully, but they cost more and are harder to track down, so I reach for them less often.

Cotton pads are a staple, especially in my personal work where I get to choose what flowers I press.
How to use them
Keep paper top and bottom. I still put paper on the very top and bottom of each flower layer, with cardboard between layers, for a sturdier, more even pressing surface than pads alone.
Stack deliberately. Until someone designs pads specifically for pressing, they do not sit inside a standard wooden press as neatly as paper does. You have to be more careful about how you build each layer.
Refresh like paper. Use plenty on each layer, and swap in dry pads after the first 48 hours, exactly as you would with paper.

Bamboo washable towels are an excellent pressing medium, especially when combined with additional blotting paper in a wooden press.
Desiccant boards
One newer option is worth flagging, though I have not tested it yet:
What they are: essentially reusable silica in board form, meant to dry flowers faster in a wooden press.
The downside: they are expensive and only come in letter size.
As pressing keeps going mainstream, more materials like this will arrive, and I will put them to the test when they do.
Why I combine methods (and the ones I actually use)
Here is the shift that took my own work from good to reliable: no single pressing method is best at everything.
The key to good, consistent results? Combining methods.
Here are the four combos I reach for:
1. Microwave first, then the traditional press
My go-to for a flower I want to keep whole.
A quick pass in a microwave press pulls out that first heavy wave of moisture fast. The wooden press finishes with a smooth, natural flattening.
A couple of tips:
Stop at halfway dry. Usually two or three rounds of 30 to 40 seconds at 80% power, wiping condensation between rounds.
Watch for the cooked look. Push it too far and petals lose definition, thin out, and fuse. Pale and white flowers show this fastest.
Works beautifully for roses (thinned first), lisianthus, lilies including calla lilies, and white snapdragons.
2. Press first, then finish in silica
I use this when I want to keep some of a flower’s fullness while still getting it mostly flat.
How I do it:
Press hard for the first two days, then move the flower into silica gel to finish.
Flatten the silica bed first. Build little mounds and the flower dries into that lumpy shape.
Lovely for garden roses and peonies, and it reduces the risk of browning because flowers rarely brown in silica. Ranunculus can work here too, with a warning: it likes to stick to paper and can tear.
3. Silica first, then a press
This runs the other direction and is a strong browning-reducer. Dry the flower in silica, then let it sit in open air until it draws just enough moisture back to turn flexible rather than crisp. Then, press it flat.
There’s a catch: silica leaves fine sand on the petals.
On ranunculus and dahlias, it is very hard to get every grain off. Press with sand still trapped and you can get little imprints or holes. Clean thoroughly before this one goes under pressure.
4. Traditional press first, then a dehydrator press
A dehydrator press dramatically speeds up drying, and I use it as a finisher for thicker flowers.
How I do it: two days in the traditional press for a clean flattening, then into the dehydrator to finish.
Best for thick, slow-drying flowers like stock, roses, calla lilies, and tulips.
It takes a specific setup and some know-how about which flowers tolerate it, so I am saving the full method for a post of its own.
Humidity, drying, and mold
The room you press in is a silent partner in the whole process.
Humidity is the main culprit.
When the air is damp, it pushes moisture back into your flowers and paper. And slow drying is exactly what browning and mold love.
I press in Chicago, where the summer air gets heavy, so in the warm months I lean on a few habits:
Change paper a little more often, keep a fan moving air around the press, and run a dehumidifier in the studio.
Give thick, wet flowers like orchids extra patience, a paper change every two days and a longer stay in the press.
Make sure any paper you reuse is bone dry before it goes back in. Paper that feels dry can still hold humidity from the air, so I dry mine in the oven on the lowest setting.
Learn to tell when a flower is actually done. A finished petal feels papery and smooth, with no cool, silky dampness. My quickest check is the flop test: hold the petal up by its base; if it flops over it needs more time, if it holds itself up it is ready.
The flowers that fade no matter what
Some flowers will lose or change their color no matter how perfectly you press them.
This is not a technique failure. The flower’s pigment is simply doing what it does.
The sooner you know which flowers these are, the less heartbreak you will have:
Pale bachelor’s buttons, most pastel tulips, and ranunculus are reliable faders.
Some lavender lisianthus turns buttery yellow or goes blotchy with patches of greenish lavender.
White cosmos presses to a dark ivory, while purple, lavender, and orange sulfur cosmos hold well.
Orchids and lilies lose their color almost completely when pressed or dried the usual way. Only freeze-drying holds color reliably.
A few roses shift unpredictably: toffee roses drift toward purple, quicksand roses go a muted greenish. Certain pale pink-lavender varieties settle into a grayish pink.
What to do when the color changes
You have two honest paths, and neither is wrong.
Let it go, and even lean into it. A white rose warming to gold, or a pink settling into a dusty antique rose, can be lovelier than the fresh flower was, and plenty of pressed-flower artists build their whole look around these aged tones.
Color correct. Careful, light-handed techniques can bring a faded flower back toward its original color while still looking natural and not painted on.
It is a real skill that pro pressers use, and it is what turns a color promise to a paying client into something you can actually keep.
For a flower-by-flower look at how whites in particular behave, see my white flowers guide.

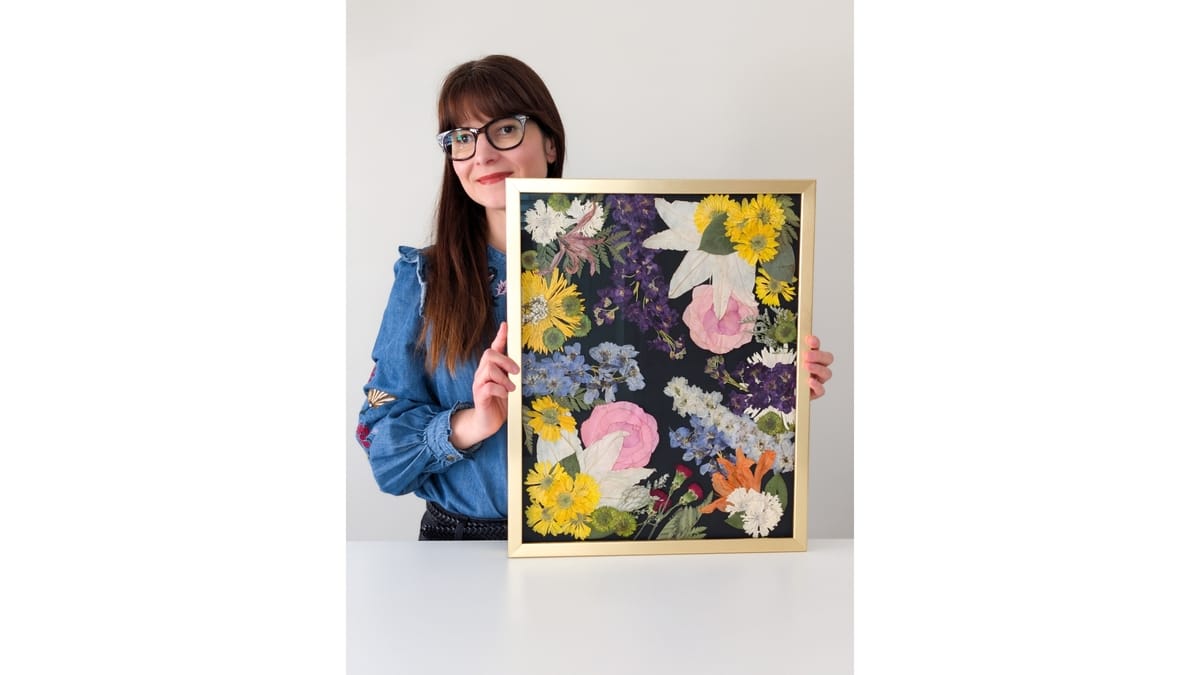
None of these flowers were color corrected. The secret? I pressed them right after I picked them from my client’s garden and stuck to the simple principles I cover in this article.
Keeping color once pressed
Pressing the flower well is half the job.
Keeping it bright once it is framed and on a wall is the other half, and it comes down to two enemies: light and moisture.
Light is the big one.
Direct sun will fade even a well-pressed flower faster than anything else, so hang finished pieces out of direct sunlight and frame anything you want to last behind UV-protective or museum glass.
That glass is the single best investment for longevity.
My burgundy and orange dahlias kept their color for more than 4 years behind museum glass before they began to shift. Without that protection, and in a sunny spot, the same flowers fade far sooner.
And remember that the green goes first!
That four-year-old sweet pea still holds its purple, but its stem browned out around the two-and-a-half-year mark.

My sweetpeas grown and pressed in 2022: the fading is noticeable, but the dark purple flowers still hold their color.
So when you design an heirloom piece, lean on your deepest, most saturated flowers for the parts you want to stay true. Treat foliage and pale accents as the elements most likely to soften.
A note for anyone selling their work
If you sell your work, or you are thinking about it, how you handle color becomes part of how much your buyers trust you.
Most people will ask: Will it stay like this?
You can tell them plainly that real flowers change, that a little shifting is part of the beauty and the proof the flower is real. Many buyers love exactly that.
Or, if you want to promise a piece will look much as it does the day they buy it, you can learn to protect and correct color so you can stand behind that promise.
Both positions are respectable.

Every single element in this bridal commission was color corrected. My clients want their flowers to look vibrant beyond their natural, untouched lifespan.
The only real mistake is letting a buyer assume a permanence you cannot deliver, then leaving them disappointed a year later.
Decide which promise you are making, and make it out loud.
Here is what I hope you take from all of this: browning and fading follow rules.
They are moisture and pigment behaving the way they always do, not a verdict on your skill.
Once you can tell which is which, you press with confidence rather than hope.
That confidence opens the door to bigger things: a wall full of your own work or a business built on it.
Go deeper
Here are related articles about the methods I mentioned:
Why pressed flowers turn brown: the companion diagnosis piece, the moisture-driven causes of browning one by one, for when you need to figure out what went wrong.
How to press flowers with a traditional flower press: the full press setup behind the fundamentals here, plus the flop and touch tests for knowing when a flower is done.
How to press flowers with a microwave press: the step-by-step for the microwave-first combo, the fastest way to protect color on thick, water-heavy blooms.
How to press small flowers: the cotton pad method: the thirstier setup for tiny, delicate flowers that stiff paper would crush.
How to press white flowers: a flower-by-flower look at whites, the fussiest color group, sorted into the reliable, the changing, and the difficult.
How to store pressed flowers so they last for years: keeping finished pieces bright, plus the oven rescue for a flower that softens in a humid stretch.
Flower pressing tools, equipment, and supplies: the exact presses, papers, and desiccants I keep in my studio.
10 hardy annuals to grow and press in a zone 5-6 cutting garden: harvest windows and varieties that press well, if you grow your own.
8 summer annuals to grow and press in a zone 5-6 cutting garden: the warm-season companion to the hardy annuals list.
I would love to hear from you. Which flower have you fought hardest to keep bright, and did you win? Or is there a color shift you have stopped fighting and started to love? Tell me in the comments!
Some links on this page are Amazon affiliate links. If you purchase through them, I earn a small commission at no extra cost to you. I only link to products I personally use in my own studio.