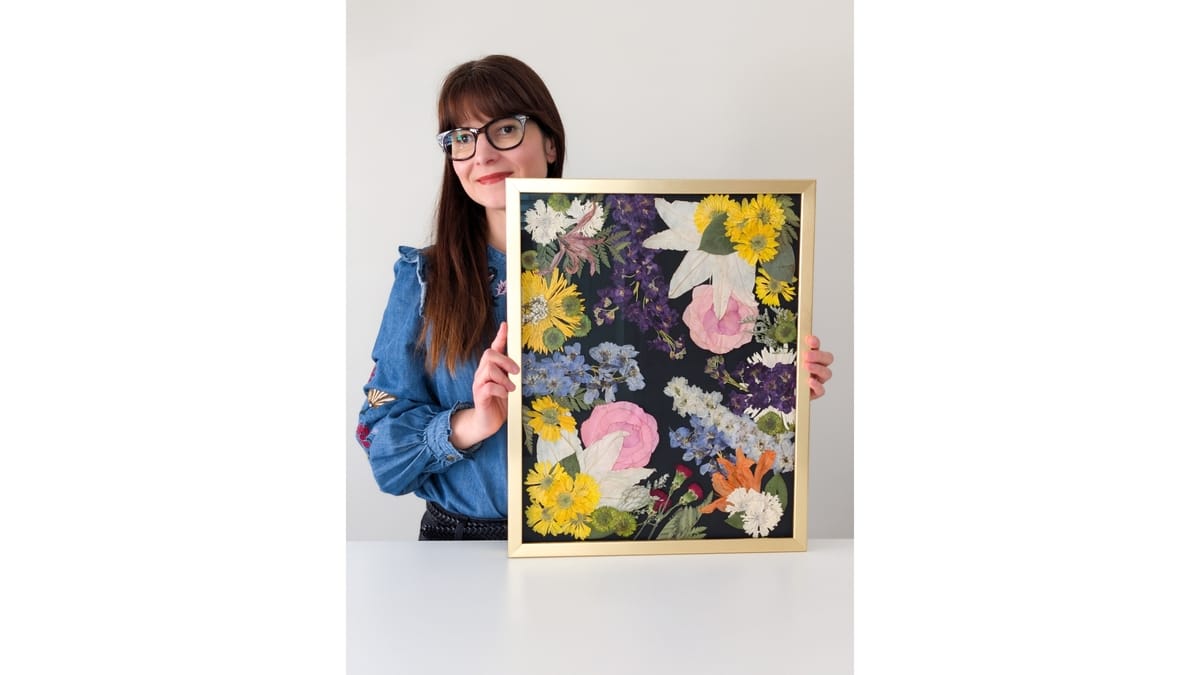

Browning is the single most common reason people give up on flower pressing. It feels like a failure. Usually it isn’t. It’s a clue.
I’ve pressed tens of thousands of flowers since 2021, preserved over 350 wedding bouquets through my practice, Bloom & Make, and made every mistake in this post at least once.
Most of the browning advice I see online boils down to “use fresh flowers and change your paper.”
That’s true, as far as it goes… and it doesn’t go very far.
It doesn’t explain the chemistry.
It doesn’t distinguish between the five different ways moisture can ruin a flower.
It doesn’t tell you which browning you can prevent and which is just biology doing its thing.
After all these years of pressing, I’ve narrowed it down to 7 causes.
Some are technique problems with easy fixes. One of them isn’t really a problem at all.
Here they are, in the order you’re most likely to encounter them.
1. You pressed the flower while surface moisture was still present
This is the most common cause and the easiest to prevent.
The principle is worth memorizing: you want flowers that are dry on the outside and hydrated on the inside.
Internal hydration holds color and shape during pressing. Surface moisture does the opposite.
It causes oxidation, the chemical reaction that turns petals brown. Enzymes in the flower's cells react with oxygen in the presence of water, and the pigments break down.
It's the same reaction that turns a sliced apple brown on the counter.
Where that surface moisture comes from depends on where your flowers came from:
If you're cutting from your own garden, the culprits are morning dew, recent rain, and overhead watering. I pick in the late afternoon, around five or six o'clock.
If you prefer a morning cut, that's fine. Put the flowers in a vase for a few hours and let any trapped moisture evaporate before they go anywhere near the press.
If you're pressing flowers you didn't grow, the sources of hidden moisture are different.
Store-bought bouquets are misted constantly to keep displays looking fresh.
Florist arrangements sit in water until the moment you pick them up.
A bride's bouquet might have water tubes tucked into the stems, damp tissue wrapping, or condensation from being refrigerated and then carried into a warm reception hall.
The fix
Before pressing any received flowers, unwrap everything, remove any water sources, and let the flowers sit on a dry surface for 20 to 30 minutes so surface moisture can evaporate.
I go into more detail on harvest timing and surface moisture management in my traditional press guide.
2. The flower was too thick to press whole
This is the reason most people end up with brown roses.
Overlapping petals trap moisture between layers. Even with perfect paper changes, the moisture decays the inner petals faster than the press can draw it out.
Roses, peonies, dahlias, ranunculus, and any double variety of garden flowers are candidates for this problem.
The fix
If the flower has more than 2-3 rows of petals, consider deconstructing it:
remove the petals,
press them individually, and
reassemble later in your artwork.
A few specifics that have saved me:
Roses: there's a rounded bump at the base of the flower head (the hip, where seeds form). Cut as close to the head as possible to eliminate that bulk, but carefully. Cut too close and the whole thing falls apart.
Thick stems like hellebores or tulips: slice them in half lengthwise with a box cutter and press the two halves separately.
Hollow stems: usually fine as-is.
If you want to keep roses whole for a more natural look, flex down the outer two or three layers of petals, then gently remove petals from the inner rows. You end up with a clean, open rose face that presses flat without trapped moisture.
Fair warning: pressing roses whole is the harder technique.
If you’re still building your skills, petal by petal is the safer route.
Dahlias also benefit from deconstruction. The petal count and center thickness make whole pressing extremely difficult. I wrote a separate post on growing and pressing dahlias that covers a few tips, including a two-step method.

3. You used the wrong paper
I see this one constantly in online tutorials.
(It makes me a little crazy!)
Do not use parchment paper in a flower press!
Parchment is designed to be non-stick and moisture-resistant, which is the opposite of what you need. Your paper's entire job is to pull water out of the flower.
Parchment sits there doing nothing while your flowers brown and rot underneath it.
Here's how the common options actually behave:
Wax paper: even worse than parchment, for the same reasons. Skip it.
Paper towels: they work as absorbent layers, but the quilted texture presses right into delicate petals. If you want the extra absorption, tuck them into the middle of your paper stack, away from direct contact with the flowers.
Plain copy paper: this is what actually works. Regular printer paper, letter size, even if it's already been printed on. Use 10 to 12 sheets per side of each flower layer.
Blotting paper: the upgrade once you get serious. Thicker, more absorbent, and it lets you cut the sheet count roughly in half.
The fix
I started with copy paper and switched to blotting paper once I knew this was more than a weekend hobby. Both produce good results.
For very small, delicate flowers like feverfew or chamomile, I actually use a completely different method: cotton makeup pads. They’re surprisingly effective and I wrote a whole post about why.

4. You didn’t change your paper on schedule
Your paper absorbs moisture from the flower. That's its job.
If you leave that damp paper in place too long, the moisture has nowhere else to go. It sits against the petals and triggers the same oxidation that causes browning in the first place.
You gave the flower a bath towel and then never swapped it for a dry one.
The fix
Here is my schedule for most flowers:
First paper change at 48 hours after pressing.
Second change 48 to 72 hours after the first.
Then leave the press alone for at least 7 more days.
Total time in the press for most flowers: about 12 to 14 days.
Some flowers need extra attention:
Daisy-family flowers (calendula, rudbeckia, feverfew): the thick central disc holds water longer than the thin petals around it.
Anemones: same issue, and their dark, moisture-heavy centers can bleed color onto surrounding petals if you don't get the damp paper out in time.
High-moisture flowers like orchids or chrysanthemums: I use the microwave press first, then move to a traditional press, changing paper every 2 days for the first week and leaving them in for up to 3 weeks.
One thing I’d caution against: changing paper every single day.
That advice is common online, and I disagree with it.
Handling flowers that aren’t set yet tears them. They’re sticky, fragile, and they bruise easily.
The 48-hour minimum gives flowers time to start drying and firming up a little before you disturb them.
5. Your environment was working against you
I press in Chicago, where summer humidity regularly hits 65 to 75%.
The air itself is putting moisture back into your flowers and your pressing paper while you're trying to dry them out.
The fix
Three things help:
Press placement. Keep the press in a well-ventilated area (not a closet or closed shelf), near a floor vent or with a fan pointed in its general direction. Moisture evaporates out through the wood and cardboard, and it needs somewhere to go.
Dry replacement paper. If I have any doubt, I put it in the oven at the lowest setting for 15 to 30 minutes before using it.
A small dehumidifier or AC in the room where you press makes a real difference during the worst months.
Winter pressing is easier. The air is drier, and the press does its job with less babysitting.
6. The flowers were already compromised before they reached the press
Sometimes the browning started before you did anything wrong. The flower entered the press already on its way to failing, and no amount of perfect technique was going to save it.
Overripe flowers have weakened cell structures and excess moisture, and both accelerate browning. Wilted flowers that have already begun to decay will continue to decay in the press.
The fix
It’s not really possible to revive a severely wilted flower. You can still press it, but the result won’t be great.
If you press professionally, be upfront about it with your clients or offer color correction.
7. The color was always going to change
This is the one that trips up a lot of people.
Some flowers brown or shift color no matter what you do. That's chemistry.
White and pastel flowers are the highest-risk category. White roses, white lisianthus, white orchids, pale pink sweet peas. Their pigments are fragile. White lisianthus turns yellow in the microwave press.
That’s expected behavior, and it’s not something you did wrong:
Some white flowers brown during traditional pressing no matter how quickly you change the paper.
Sweet peas fade significantly during pressing and keep fading over time.
Reds deepen toward burgundy.
Yellows warm into gold. Rudbeckia in particular deepens over time.
Pinks go dusty rose or lavender.
If you’re pressing for a client, the color conversation needs to happen before you start.
And if you’re pressing for yourself, knowing which flowers are reliable and which are risky saves a lot of heartache.
Bonus: When heat is the problem
If you use a microwave press, there are three additional causes of browning specific to the method.
Your pads weren’t conditioned. If the pads are bone-dry and the flower doesn’t have enough moisture to absorb the microwave energy, you get scorched wool and a scorched flower. Condition the pads by misting them and running the press for 20 seconds at 80% power.
Your power was too high. If you have a newer machine (1100 watts or higher), drop to 70% for your first few sessions while you learn how your specific microwave behaves. There is no universal timing chart. You have to learn yours.
Your bursts were too long as the flower dried. The first burst is the longest (I start at 40 seconds). After that, go shorter with each one: 35, then 25, then 15 to 20 seconds. White and pastel flowers are the most vulnerable. If you smell burning wool, stop immediately.
My full microwave press guide covers the hybrid method (microwave first, traditional press to finish), which is how I get professional results from the microwave without the “cooked” look that gives the method a bad reputation.
The real pattern
If you read through all seven reasons, you'll notice they share a thread: moisture, and how quickly you get it out of the flower:
Reasons 1 through 5 are all variations of "moisture stayed too long."
Reason 6 is about the flower's starting condition, which determines how much moisture you're dealing with.
Reason 7 is the reminder that some things aren't moisture problems at all.
The encouraging part: most browning is preventable.
Change your paper on schedule, deconstruct thick flowers, pay attention to what’s wet and what isn’t.
Learning happens quickly once you start paying attention, and every press you open teaches you something, whether the results are gorgeous or disappointing.
Go deeper
Traditional press guide: harvest timing, paper choices, and everything else that goes inside the press.
Microwave press guide: the hybrid method that gets professional results without the cooked look.
Gluing guide: reassembling deconstructed roses and dahlias into finished work.
Cotton pad method: my go-to for tiny, delicate flowers like feverfew and chamomile.
Storage guide: the oven rescue for softened flowers, plus long-term color performance.
Growing and pressing dahlias: the two-step method for the trickiest thick bloom.
Pressing hellebores: the one-paper-change flower that's perfect for beginners.
Hardy annuals guide: harvest windows and color retention for 10 spring and early-summer flowers.
Summer annuals guide: the same breakdown for six warm-season flowers.
What’s the flower that gave you the most trouble with browning? I’d love to hear what happened and whether you figured out the cause. Drop a comment and let’s troubleshoot together.