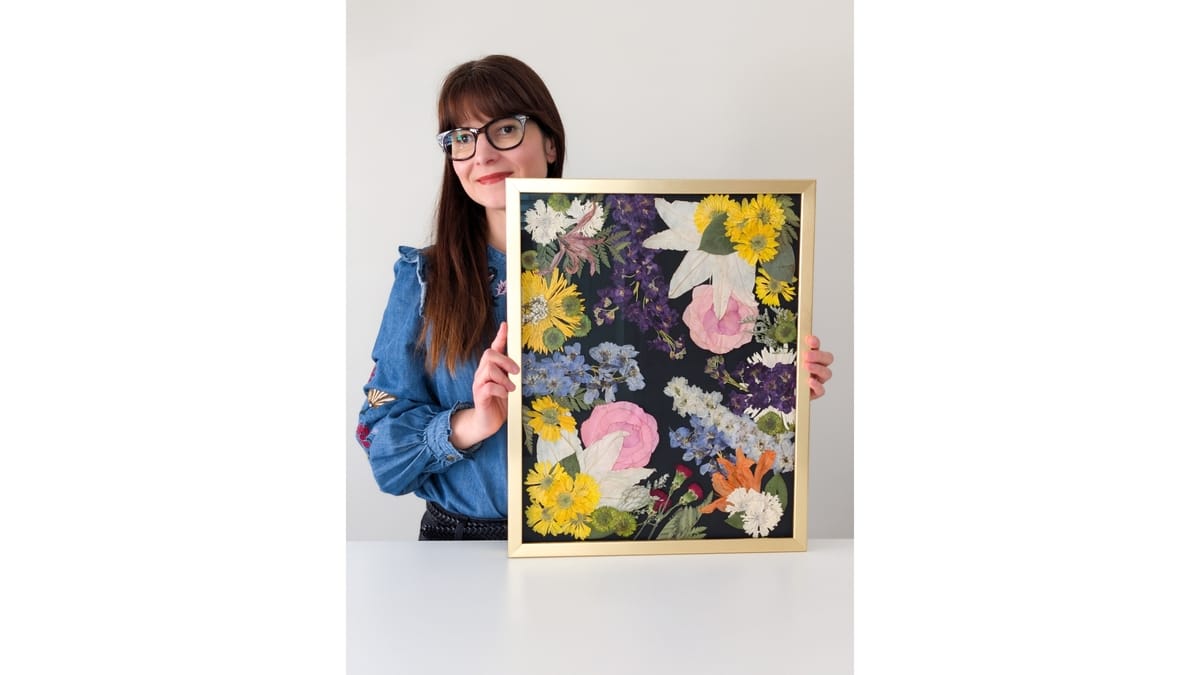
Most advice about pressing thick flowers gives you two options:
take the bloom apart petal by petal, or
pick something flatter and move on.
What if there was a third option that allows you to press them whole?
I have been pressing professionally since 2021, and these two flowers that I grow and love used to be real stumpers.
They seemed impossible to press.
The microwave method ruined them every single time. Pressing petal by petal was incredibly time-consuming.
And when you press professionally, you need a reliable, efficient method that saves time AND consistently gives you great results.
This year, I had a breakthrough, and I’m thrilled to share it with you!
Let’s dig in!

Whole pressed zinnias and coneflowers, straight out of the press. No deconstruction, no rebuilding.
What you need
Nothing exotic, but the quantities are higher than you are probably used to:
A traditional flower press. Mine has 8-inch bolts, and that depth is what makes this method possible.
Cardboard for the outside of every layer.
Blotting paper, 6 or 7 sheets per side. If you use copy paper instead, double that. (This is the blotting paper I buy)
Reusable, washable bamboo towels, 5 or more per side. (These are the ones I use)
Jumbo pads, 4.7x5.9 inch as an alternative to towels, for smaller flowers (my usual pads). Same ones I use for the cotton pad method.
Sharp scissors for cutting the holes.
Fine-pointed tweezers for the layer changes.
A reminder on your phone. Set it every single time. The 48-hour changes are the whole ballgame, and life is very good at making you forget.
Which flowers this method works for
This method solves one specific problem: a thick, moist center attached to petals thin enough to press flat. If your flower is built that way, you’re in business.
Here is what I press this way:
Zinnias and coneflowers. The two this guide is built around.
Black-eyed Susans. Structurally a coneflower. Treat them exactly the same.
Daisies, any variety. The easiest of the bunch, and they take to it beautifully.
Sunflowers, with extra care. Thicker and juicier than anything else here, and they need a few adjustments of their own. I will cover those in a separate post.
Collarette dahlias. The open-center types work well. The center sits exposed instead of buried under a hundred petals, so the drying layers can actually reach it.
And here is where it falls apart:
Pompom dahlias and full dahlias. Dense petals the whole way through, with no open center for the cut holes to work into.
Tropicals, including orchids. A different structure, and a different set of problems than this method was built for.
Ranunculus, and anything with fluffy, juicy petals. The petals themselves are very delicate and hold too much water.
Your press has to do two jobs at once
Here is what makes a thick flower different from a cosmos or a pansy.
The center and the petals want opposite things at the same moment:
A thick center needs somewhere to sit down into, plus a lot of absorbent material packed around it, because it is moist and it gives that water up slowly over several days.
The petals need firm pressure the second they go in, because they are thin, and they will curl and shrivel while they wait for the center to soften.
Lay a whole zinnia between flat layers and you solve one of those problems while creating the other.
Pick at the right stage
Coneflowers: catch them before the cone builds
A young coneflower has a flat, slightly spiky center.
As the flower matures, that center swells into the cone that holds the seed, and it keeps going, up to two inches.
Cut them when the cone is no more than 1/4 to 1/2 inch tall, and the petals are fully unfurled.
Past that size, the cone will not compress. Not with more pressure, not with more time. And on the rare occasion it seems to have worked, the flower usually comes apart later anyway.
Zinnias: the wiggle test
Zinnias are more forgiving about stage, with one big exception.
If you press them within an hour of cutting, the stage barely matters. Cut whatever looks good to you and get it straight into the press.
But if you let them sit in a vase for a day or two first, the stage matters enormously. A zinnia cut too early wilts in the vase and never fully recovers.
So here is the test I use:
Take the stem at least 10 inches below the bloom. Down the stem, not up near the flower head.
Shake it gently back and forth. A small side-to-side movement is all you need.
Watch the head. A flower that flops sideways is not ready. A stem that stays stiff, with the head barely moving, is ready to cut.
A zinnia can look completely open and finished and still flop on the shake test, and that is especially true of the singles and the few-row varieties. The stem tells the truth.
The method
1. Cut holes in your drying layers
This is the trick that makes the whole thing work.
You are building a well for the thick center to sink into, so the petals can lie flat against the layer instead of tenting up around a dome.
Only one side needs holes. I usually cut the top side, though I have done the bottom plenty of times and either works.
Bamboo towels
Fold each corner in toward the middle, or slightly past the middle.
Snip a small V at the fold.
Repeat for all 4 corners.
Unfold. You have 4 square holes, evenly spaced, ready for 4 flowers.

Fold the corner in and snip a V. That V opens into a square hole when you unfold the towel.

The unfolded towel: four holes, four flowers, spaced to fill a letter-size press.
Every towel on the cutout side gets holes, not just the sheet touching the flower. All five or more of them.
That stacked depth is what gives the center somewhere to go instead of bottoming out on a solid layer.
Cotton pads
Rather than full sheets spanning the press, you build a small stack under each individual flower.
Fold the pad in half along the long edge.
Cut a small opening at the middle of the fold.
Unfold. One hole and one flower per pad.
You want three pads under each flower and three on top in the initial press build. Every pad on the cutout side gets a hole, same rule as the towels.
Cotton is thicker and more absorbent than bamboo inch for inch, so you need fewer of them to do the same work.
One limitation worth knowing: pads are too small for large blooms.
If a flower overhangs its pad, or crosses the seam between two pads, the petals pick up lines.
Keep the pads for your small and medium flowers.

Cotton pad build: 6 stacks arranged 2 across and 3 down, filling a letter-size press. You can see the cut holes on the empty pads.
2. Build the stack
Bottom to top, a single layer looks like this:
Cardboard
6 or 7 sheets of blotting paper (double or more if you are using copy paper)
5 or more bamboo towels, or the cotton pad bases
The flowers
5 or more bamboo towels, or 3 cotton pads over each flower
6 or 7 sheets of blotting paper
Cardboard
Then start the next layer the same way.
The placement rule is where people go wrong.
The base of the flower goes into the hole. Not the face.
If your cutouts are in the bottom layer, the flowers sit face up with the base pushed down into the hole. If your cutouts are in the top layer, the flowers go face down.
Either way, poke the base through and settle the surrounding layer snug against the back of the petals so nothing is floating.

The base of the flower goes down into the hole. Push it through and seat the layer tight around it.
How many flowers and layers
4 large flowers per bamboo towel layer. Space them so no two blooms touch.
6 flowers per cotton pad layer, arranged two across by three down in a medium press that fits letter or A4 paper.
3 layers is about the ceiling for large thick blooms in a press with 6 to 8 inch bolts. The stack is thick at the start and it will not close on more.
4 or 5 layers is fine if you are working with smaller flowers on cotton pads.

Four coneflowers on a towel layer. Room between them, nothing overlapping.
Do not cram! These flowers are juicy. All that water has to go somewhere, and a press packed too tight with moisture creates the exact problem you are trying to prevent.
3. Tighten harder than you think
Close the press and stand on it while you tighten the bolts. I mean that literally, both feet.
The next day, do it again. Stand, tighten, and keep going until the screws will not turn any further.
Do not change any layers on day 1. Pressure is the only job that day.
While we are here, let me kill a myth.
You will read that a flower press needs air circulation. It does not!
What it needs is enough absorbent material to pull the water out, and enough pressure to hold everything flat while that happens.

A loaded press from the side. That is three layers of thick blooms, and it will slim down considerably by day 4.
4. Schedule the layer change
First change: at 48 hours
Set a timer the moment you close the press.
48 hours. Not 3 days, not when you happen to remember!
With the flowers that tend to brown around the center, one extra day in wet layers is enough to tip them into rot.

Mid-press. You can already see the color shifting, and it shifts differently flower to flower.

Peeling back the top layer at a change. See the staining where the center sat? That is exactly the moisture you want out of there.
At this point, the flowers are still soft, still sticky, and nowhere near dry. They will want to cling to the towels.
Here is what to do:
Lift each flower with fine pointed tweezers and set it onto the rebuilt layer. Slow hands, no rushing.
Straighten any folded or creased petals now. This is your window. Wait another couple of days and the crease sets and shows in the finished flower.
Skip the cutouts this time. The centers have compressed enough that flat layers will handle them from here.
Rebuild in the same order. With cotton pads, drop to 2 or 3 per side and judge it by how the flowers look and feel.
Consolidate if you like. With so much moisture already gone, you can usually fit a fifth flower on a towel layer, though four is still the safe call.
Do not add fresh flowers to this press. They dump new moisture into layers that are already working hard. Start a second press instead.
Stand, tighten, reset the timer.

Fine pointed tweezers doing double duty: lifting the flowers across, and coaxing folded petals back into place.
Second change: another 48 hours later
Everything is flatter and drier now, and the press has slimmed down noticeably.
You can drop the towels entirely at this point and go paper only: 6 sheets of blotting paper per side, or double that in copy paper.
Close it up and tighten hard again.
Third change: three to four days later (maybe)
This one is a judgment call, and you get to make it.
Press a fingertip to a petal:
If the flowers feel dry and papery, skip the change and go straight to the final rest.
If they still feel cool or a little soft, or you can see browning creeping around any of the centers, change again after two days instead of four.
The final week
Leave them undisturbed for a week or so. Paper only, press cranked tight, timer off.
Then open it up.

The reveal. Whole zinnias and coneflowers, flat, intact, and never taken apart.
The very thick doubles need a longer schedule
The zinnias with hundreds of petals are their own project.
I recommend thinning the petals evenly around the center and the back. You may pluck additional petals from the middle.
Change the layers every two days for up to 10 days, then leave them alone in the press.
Expect a little browning around the center regardless.
Some links on this page are Amazon affiliate links. If you purchase through them, I earn a small commission at no extra cost to you. I only link to products I personally use in my own studio.
How color will change
Coneflowers hold beautifully
The pinks shift toward lavender. Every other color typically darkens a shade or two. The cone itself keeps its color and does not discolor.
Zinnias can be are a gamble
Zinnias are a different conversation.
Reds turn a very dark, brownish burgundy. The darker oranges tend to dry brown more than the lighter ones.
Dark reds and dark purples can lose color unevenly, so you end up with some petals holding while others go patchy.
The white-green variety will almost always turn greyish or even brown completely.
That change happens even when your press is doing everything right. It is simply how those colors behave as the flower dries.
It’s a separate problem from the browning that comes from moisture sitting in the press too long.
If you want to tell the two apart, I walk through it in why pressed flowers turn brown.
And here is the part you should keep in mind.
You can put two identical zinnias in the same press, on the same layer, with the same layer changes, and one will brown while the other comes out perfect.
Don’t get discouraged! It has nothing to do with your technique and everything to do with that particular flower.Go deeper
How to press flowers with a traditional flower press: the full press setup this method builds on.
Why pressed flowers turn brown: how to tell an ordinary color change from actual rot.
How to press small flowers with the cotton pad method: the pad technique in full, for everything smaller than a zinnia.
Flower pressing tools, equipment and supplies: everything I actually keep in the studio.
How to store pressed flowers so they last for years: what to do with them once they come out of the press.
8 summer annuals to grow and press in your zone 5-6 cutting garden: where zinnias earn their spot in the beds.
Let me know in the comments which thick flowers are giving you a headache!