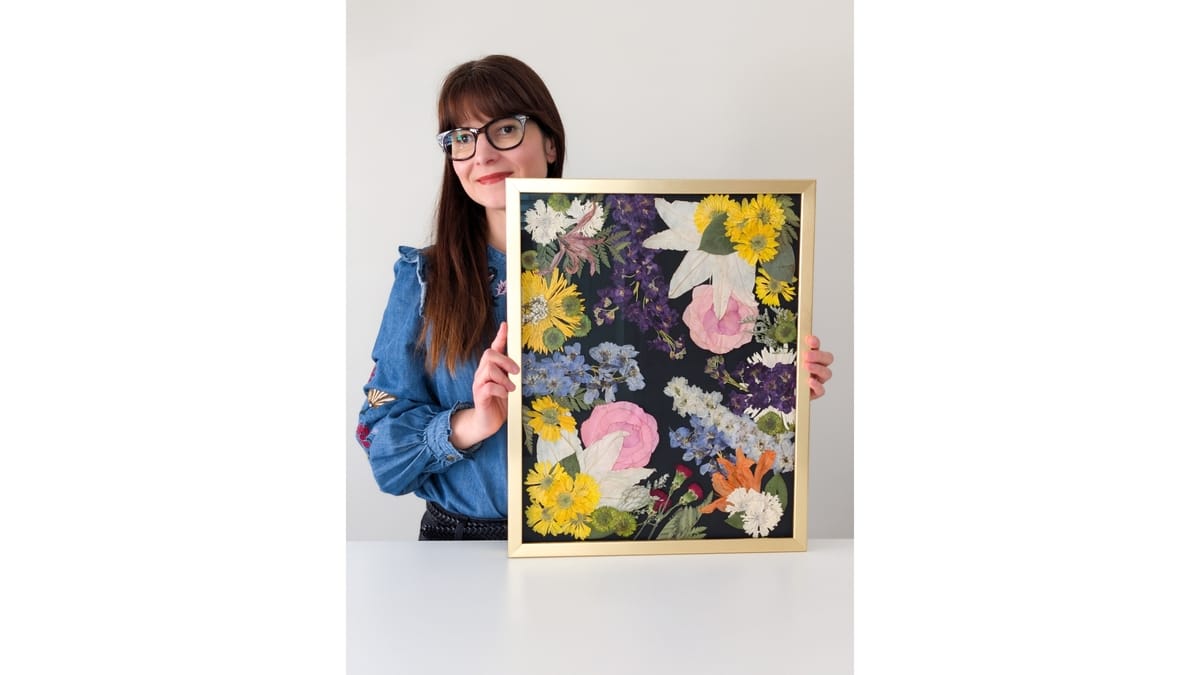

Pressing is much simpler than most beginner guides make it sound. You need a heavy book and a flower. That's the kit, and you can start this afternoon.
Most beginner guides online try to cover four methods at once and ask you to pick. This guide takes a different approach. You'll start with one method. You'll press one flower. By the time you're done, you'll know enough to decide what to try next.
What pressing actually is
Pressing is removing moisture from a flower while keeping it flat under steady pressure. The flower loses water, the paper absorbs it, the weight holds the shape. Color sets. Days later, you open the book and have a botanical specimen that looks more or less the way it did when you picked it.
The underlying physics is just water leaving a plant under pressure. The craft of pressing comes in over time: choosing the right flower at the right moment, managing moisture along the way, learning what each species needs from you.
What you need
Your complete starter kit for your first project:
A heavy hardcover book with uncoated pages. Dictionaries, textbooks, and hardcover novels all work. Avoid mass-market paperbacks (the binding warps) and books you love (a pressed flower can leave a slight outline on the pages). Avoid coffee table books - they use glossy paper, which doesn’t absorb moisture well.
Several heavy books or dumbbells to stack on top for extra weight.
Tweezers for handling delicate petals once they're dry.
Cardstock or handmade paper (for the project)
If you fall in love with pressing (and you might), the natural next step is a traditional wooden press, which gives you more consistent pressure and lets you press a dozen flowers at once. I've written a full guide on that here. For your first attempt, though, a book is more than enough.

Columbine from my garden that pressed very well with the book method
What to press first
Some flowers are forgiving. Others test your patience and break your heart. Start with the forgiving ones. Here's my short list for true beginners:
Clover: common in summer lawns, free, and the bloom presses to a clean ivory. Some varieties include dainty yellow flowers. The leaves press beautifully as well.
Primrose: early-spring color from garden centers or neighborhood yards, thin petals that flatten quickly.
Petunia: thin-petaled, color holds well.
Cosmos: single layer of petals, presses flat and fast, a summer garden classic.
Columbine: looks delicate, presses surprisingly flat, available late spring into early summer.
Ginkgo leaves: autumn's gift to pressers, distinctive fan shape, and color holds beautifully.
Loose rose petals: pulled from any rose bouquet you already have. You don't have to press a whole rose to press a rose.
That last one is worth lingering on. A whole rose is intimidating for a beginner: thick centers, layered petals, lots of moisture. Loose petals from a bouquet on your kitchen counter are forgiving, beautiful, and feel like a small win when they come out right.

To a flower presser, “weeds” can become something beautiful!
Foraging best practices
If you're picking flowers from outdoors, a few rules to follow:
Forest preserves, state parks, and national parks usually prohibit picking anything. I learned this in October a few years back, when a runner at a local preserve (turned out she worked there) explained that my seed-pod haul was both illegal and partly invasive species. Check the rules before you bring a bag.
Roadsides on public land are generally fine. Stay back from traffic and avoid any obvious herbicide spray zone.
Private property and neighbors' yards: ask. Most people say yes.
Don't bring plant material across state or international borders. Customs will take it, and invasive species spread this way.
Avoid Queen Anne's lace (looks almost identical to highly toxic poison hemlock), wild parsnip, and giant hogweed (sap plus sunlight equals serious skin burns). Skip poison ivy, oak, and sumac in their gorgeous fall color. When in doubt, leave it.
Your first book pressing, step by step
Pick your flower in the morning, once any dew has fully dried. Bring it inside within an hour or two if you can. Fresh is better than wilted. If you’re walking around the neighborhood, bring the book with you - many flowers will wilt after 30 minutes.
Prep the flower. Strip any leaves you don't want pressed and trim the stem short. Less material means less moisture to manage.

I trimmed the extra parts before arranging in the book.
Open your book. Roughly the middle is fine. Optional: Lay a sheet of plain paper on one of the open pages.
Place the flower face down on the paper (if using). Arrange the petals the way you want them to look when dry. They mostly stay where you put them. If using the optional paper, avoid parchment paper - it will hold moisture, despite what half of the internet says.
Place page markers. Trust me on this one! You’ll forget where you put your flowers.

Don’t forget to mark your flower pages!
Close the book gently. No smashing, no sliding.

To close the book, hold the sections with flowers to avoid shifting.
Stack weight on top. Four or five heavy books are fine. Dumbbells are better. Set the whole stack somewhere out of the way, but in a spot with air circulation.

My go-to for good, even weight is a 20lb/9kg dumbbell. If you can go up to 25lbs/11kgs, even better!
Walk away. The hardest step! Resist the urge to check on it every day. Thin, flat flowers (clover, primrose, petunia, cosmos) take about a week. Sturdier ones (columbine, larger petals) take two. Anything thick or fleshy can take three.
The done test: when you lift the flower with tweezers or a fingernail, it feels brittle and weightless, like tissue paper. It holds its shape without any flex.

The pressed clover flower has a slight antique look, which sometimes happens with the book method.
A variation with better color retention: Pressing with cotton pads

For small flowers, you can’t beat the convenience and beautiful color retention of the cotton pad method. I wrote about it in detail here, but this is the quick version.
You will need:
Jumbo pads, 4.7x5.9 inch, with the smooth side identified
A large hardcover book or flat tray as your base
A second large book or flat tray for the top
Heavy weights
A sunny windowsill, optional but helpful
Here are the steps:
Start with your base. Set 2-3 pads on a large book or tray to form the bottom layer.
Arrange your flowers. Place them face down on the pads. Petals shouldn't overlap, and nothing should hang over the edge.
Cover with more pads. Layer 2 or 3 pads on top of the flowers.
Set a sturdy book or tray on top. It should cover the pads completely.
Pile on the weight. I use two 20-lb dumbbells and a 10-lb kettlebell. A few stacked books won't give you enough pressure. Go heavier than you think you need to.
Pick your spot. A sunny windowsill works well.
Check in on day 3. If the pads on top feel damp, swap them out for dry ones. Leave the flowers where they are; they're still sticky at this stage and will tear if you try to move them.
Put it back together and wait. Replace the book and weights and leave everything alone for another 4 to 6 days.
Test for dryness. Flowers are ready when they feel completely dry and papery to the touch.
Peel them off slowly. Lift each flower off the pads with a gentle hand. If anything resists, close it back up and check again tomorrow.
When something goes sideways (and what it teaches you)
Pressing is a craft you learn flower by flower. Every result is information about how that specific species behaves. The first time you press anything, you're not making a finished piece. You're observing.
Brown edges or spots: the flower held more moisture than the paper could absorb. Around day 4, very carefully peel off the flower and place it in a different book to continue pressing.
Mold: the flower started too wet, or sat too long before pressing. Harvest after the dew is fully gone and press within the hour.
Stuck to paper: slowly peel the paper back from the flower; sometimes it works better than peeling the flower from the paper.
Color shifted toward a lighter or antique tone: often normal, often beautiful. Some flowers do this every time.
Petals broke during handling: they were too dry, or you moved too fast. Tweezers and a lighter touch next time.
Each of these tells you something specific about how that flower behaves with you, your home's humidity, your paper, and your timing. Take notes if you want to. Try the same flower again with one small adjustment. That's the entire learning loop, and it's how every experienced presser figured out what they know.
A sweet first project that looks professional
A finished pressed flower deserves a small celebration! I’m so in love with handmade paper with deckled edges. It instantly elevates the look and feel of pressed flowers.
Using either handmade folded cards or single sheets, play with different layout options. If you have pressed multiple small and different botanicals, try an abstract layout. For a single flower, showcase it against a dramatic background color (I love black). For a few medium flowers and foliage, try a bouquet arrangement. The only limit is your imagination!

I love deconstructed designs. Don’t overthink it, go with your intuition!
Once you decide on a layout, it’s time to glue. Check out my gluing post for a deeper dive. Otherwise, I recommend Lineco archival glue paired with a needle tip applicator bottle (no brushes needed). I explain why in my gluing post.
Store any unused flowers in a plastic box or between the pages of a book (make sure you mark the pages!).
Where to go from here
Once you've pressed a few flowers and want to keep going, these posts pick up where this one leaves off:
One last thing
Pressing is forgiving. You'll make small mistakes and learn something from each one. Quite soon, surprisingly soon, you'll have a small drawer of pressed flowers that started with a clover from your lawn or a rose petal from a bouquet on your kitchen counter.
What flower will you press first? Tell me in the comments. I'd love to hear what you start with!